|
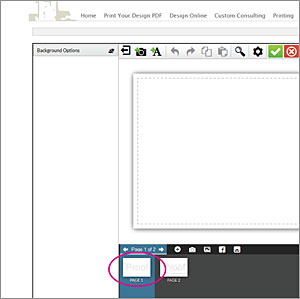
Page Navigation
These design-online templates allow you to create colorful, striking, production-ready PDFs on the fly, using your custom text and graphics.
These templates may have one page (prints one side only), or more if your piece prints on both sides, or has multiple pages. Use the thumbnails (circled in red) to navigate between pages. Pages can't be deleted, so be sure to use a single page template if your piece prints on one side only.
|
|
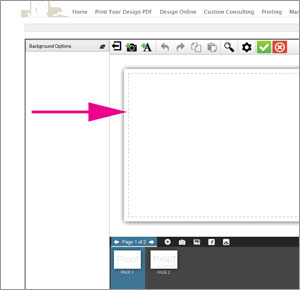
Bleed Area
The blank area on the right of your screen corresponds to the size and shape of your final piece. The dotted lines on the canvas indicate the bleed area. These lines show where the final piece will be trimmed after it is printed. It is very important that text not extend beyond these lines, as it will be trimmed off. Graphics intended to extend to the edge of the printed piece should extend beyond these lines to ensure that there are no blank areas at the edges of the printed piece.
|
|
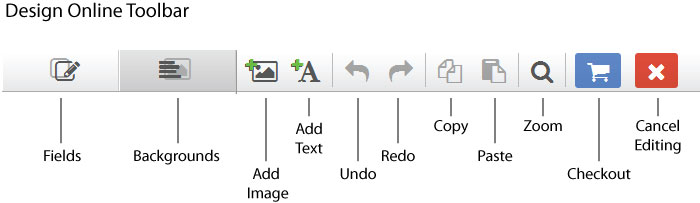
Text Options
The text field options correspond with text boxes in your design, and allow you to change the font, font color, font size, character spacing, alignment and rotation of your custom text.
|

|
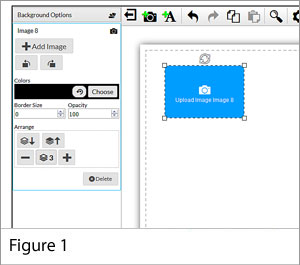
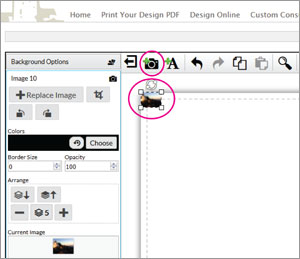
Graphic Options
The graphic options area correspond with graphic boxes in your design, and allow you to replace graphics in your design or delete existing graphics (figure 1).
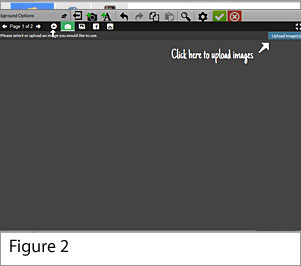
When you choose to add a graphic file, you will be prompted to select an image to be uploaded (figure 2).
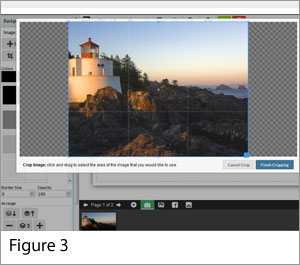
You will have an opportunity to crop pictures before uploading (figure 3).
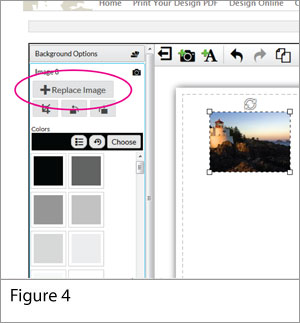
When your image has been uploaded, the image can be resized by dragging the corners. To change the shape of the image, you must use the crop tool (circled in red). You can also add image borders, rotate the image, or change the stacking order (figure 4).
|
|
Adding New Text Boxes
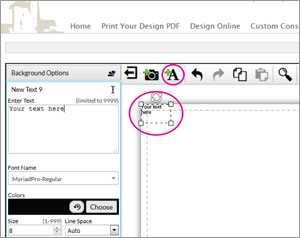
Use the "+A" icon to add new text boxes to your design. When this icon is clicked, a rectangular text area will appear at the top left of the canvas. Although initially small, this text box can be resized and moved to any part of the canvas. The options area at the left allows you to change the font, font color, font size, character spacing, alignment and rotation of your custom text. There is no limit to the number of text boxes you can create.
|
|
Adding New Graphics Boxes
Use this "picture" icon to create new graphics boxes for your design. When you select an image to be uploaded, you will be imformed if the picture resolution is too low for quality printing. You will have an opportunity to crop pictures before uploading. Once uploaded, images can me moved to any area of the canvas, re-sized or deleted. There is no limit to the number of graphic files you can upload.
|
|
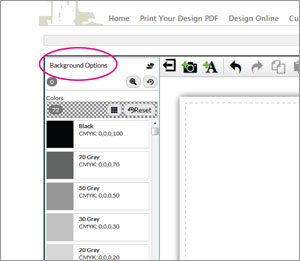
Background Color
Click this icon to choose a CMYK background color from the color palette provided. This option is not available on one or two-color items such as envelopes.
|
|